Saturday, December 11, 2010

Winter Sunshine

Mild, rainy weather followed by a sunny day is helping out my winter garden tremendously.

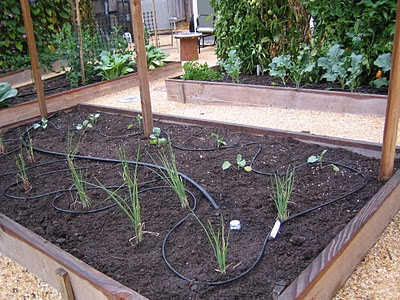
The bok choi seedlings I started 4 weeks ago were big enough to plant in the garden today.


My broccoli, now 8 weeks old, is starting to look like something.


And the peas I started 4 weeks ago have mostly all poked through the ground and are starting to leaf.


I hope this weather keeps up! We've had night time lows only down around 40, and day time temperatures in the 60's or so (except for today's sunshine which probably brought the garden up to the 70's).

Birding

Caught this little bird in my bird bath while I happened to have a camera on me.


Sunday, December 5, 2010

Garden Bounty Minnestrone Soup

This delicious soup uses zucchini, pole beans, carrots and tomatoes from the garden that I'd prepped and frozen over the summer then thawed right in the pot. In addition, I added freshly picked cabbage, parsley, oregano and chives from the fall crop.


1 large yellow onion diced
1 1/2 cups diced carrot
1 1/2 cups diced celery
3-4 crushed and minced garlic cloves
6 cups peeled and diced tomatoes with juice
2-3 cups sliced zucchini with juice
2-3 cups cut pole beans with juice
2 cups chopped cabbage
1 can kidney beans drained
1 can cannellini beans drained
2 large cans (49 oz each) reduced sodium chicken or vegetable broth
2 cubes chicken or vegetable bullion (optional)
2-3 sprigs fresh oregano chopped*
4-5 large sprigs fresh parsley chopped*
2-3 sprigs fresh basil chopped*
bunch chives chopped*
2 cups small red potatoes quartered
salt and pepper to taste

* fresh herbs could be substituted with about 2 tablespoons Italian Herb Seasoning.

Sweat the onion, carrot, celery and garlic in olive oil in a large soup pot.  Put all remaining ingredients into the pot and cook for 1 1/2 hours.

This makes easily 12-16 servings.

(Side note:  I'd originally made this recipe with elbow macaroni, but found the pasta doesn't hold up to reheating or freezing.  I now use small red potatoes instead.)

Saturday, December 4, 2010

Fall Garden Weigh-In

The shelling peas I planted mid-September suffered a little frost damage, but seem to be doing fine with it. After a few weeks of cold nights (lows in the 20's) the rain has come in and the nights have warmed up to the mid-40's. In case we get another cold spell, I've got some floating row covers coming from Johnny's and will try covering them.


I'm harvesting two of my 4 cabbage plants. The heads are rather small, and I'm not sure if the ones I left in the ground will get any bigger. One book I have says once the heads are "tight" don't leave them in the ground too long, but I'm not sure what that means in very literal terms. So I'm compromising by picking the two biggest heads and leaving the smaller ones there to see if they grow a little bigger. In the meantime, these two are headed for the minestrone soup pot!


The broccoli I planted mid October has barely moved an inch. I don't plan to plant this late in the future as I'm not sure if these will do anything. The frost might have stunted them permanently. I'm leaving them there to see, as the rains are watering for me so why not?


My snow peas were hit pretty hard by the cold. Most have some sort of frost damage, but they still taste good, and to tell you the truth, when they're cooked, you can't even see the discoloration from the frost. Again, I'll probably cover these if the temps go down again. For now, they're still flowering and fruiting, so I don't plan to pull them any time soon.


This is the broccoli I planted from nursery starts mid-September.  It got hit by the heat wave which stunted a few of them.  The ones planted on this side of the bed were shaded by the pole beans and fared much better.  The heads are still small, at a stage where I'm not certain whether or not they've buttoned.  In short, our hot heat followed by frigid cold didn't help my fall broccoli.  Jury's still out on whether or not I'll have anything to eat.


Tiny sprouts are just breaking through the ground from my double-triple pea experiment. The cold definitely slowed down germination, but they're growing nonetheless.


And finally, here's the bok choi I started from seed 3 weeks ago. They didn't seem to be growing at all until I moved my mini-greenhouse from the fence to the front of the shed where they'll benefit from the warm southern exposure. That was a good move, as since then I'm noticing they're making some progress.

Saturday, November 20, 2010

The Fall Garden


A far cry from the lush summer garden, but I'm pleased to still have stuff growing.  I'm harvesting snow peas right now.  I've got English peas flowering and more that have yet to sprout.  My first planting of broccoli is just forming buds, and I've got the start of some cabbage heads.  Succession plantings of broccoli are moving s..l..o..w..l..y.  I'm pulling the green onions I planted over the summer, and have more in their infant stage. And I've got lots of parsley, some chives, oregano and sage still alive from summer.

So wow, I guess when I write it all out, I've got quite a bit going on!

Winter Pak Choi


I started Pak Choi seeds last week.  Just waiting for them to get old enough to put in the ground and survive the slugs.  In the meantime, I've got them in my mini greenhouse outside.

Sunday, November 14, 2010

The Double-Triple Bonus Pea Experiment

Double Part: I've started another succession planting of peas today, November 14th. If they mature according to the package, we'll be eating peas around January or February. Not sure if they'll survive the winter, as I would presume this is a little late to be starting peas, but I want to see how far I can stretch my growing season of peas and broccoli.

Triple part: I've started three different kinds of peas.  In case my tags wear off in the rain, I've planted:  (far right) Strike Treated, (middle) Premium, and (left) Feisty.  I will be curious to see how each of these does, and which one is my best producer for this particular time of year.  That is, if they all first get past the Double Part of this experiment and survive the winter.

Bonus:  I've used in innoculant for the first time.  We'll see if that makes any difference in the yield, as it proclaims.

Thursday, November 4, 2010

The Pea Results Are In

I picked my first snow peas today. According to the calendar I'm keeping, it took 10 weeks from the date I planted the seeds to the date of my first harvest. That's 70 days when planted in August. The seed packet says 60 days to maturity/bloom. I suppose that's about right, since they started flowering a couple weeks ago.

I just saw the first bloom on my English peas yesterday. Those were planted from seed at the end of September, so it took 7 weeks for them to bloom. I'm guessing it will be another 2-3 weeks before they have fruit big enough for picking.

So the moral of the pea story is that it's about 10 weeks from seed start to harvest when I plant in the fall. I intend to keep succession planting and see if that's the norm year-round.

Sunday, October 31, 2010

Brussel sprouts are gone

Tiny gray aphids or mites got hold of them and pretty much destroyed all the tender new growth on the inside of the plants. I might have been able to save them, but I don't like brussel sprouts enough to deal with it, and I have serious problems with leafy-type plants that get consumed by teeny weeny bugs. It's the heebie-geebie factor.

Plus, I discovered after planting them that brussel sprouts are a little bigger pain than just planting and letting them go. Apparently, you've got to top them to encourage the side shoots and all kinds of things I'm not really interested in.

So, when it comes to brussel sprouts, Bugs-1 Lori-0

Saturday, October 30, 2010

Last of summer, start of fall

Pulled my tomato plants today. This bucket is mostly full of green ones, but we'll see if any turn. I've still got some beautiful heirlooms in the fridge that need to be eaten.

But when one door closes another opens. I'm harvesting bok choi and green onions, with snow peas right around the corner. The bok choi was planted from nursery starts only 5 weeks ago. Wow, it's fast!

More Iris Photos

A helpful poster on the GardenWeb forum said this might be Mariposa Autumn.


Wednesday, October 27, 2010

First Frost

It got down to 35 in the garden last night.  I'm pretty sure this marks the official end of my summer season.  Tomatoes will be pulled and composted this weekend.  My morning glories probably have another month before the cold does them in.  In a way, I like the break I get in winter.  With only a few things in the garden, I get to relax and do things I never do in the summer, like watch TV!

My bloomin' Iris

I bought and planted this iris a year ago.  Almost immediately, it shot up a batch of green leaves that sat there and did nothing all summer long.

I was pretty convinced I'd done something wrong.  The websites said you can't plant them too deep, or if they're in the wrong spot, they'll never bloom.  I was also reading that I'm supposed to dig them up every winter and replant or they'll just rot in the ground.

Fortunately, I never got around to doing any of these things, because last week, I looked down at the plant and saw buds forming!

The excitement was that I'd forgotten what color I even planted!

I went back to the wonderful people at the GardenWeb forum who told me in California I don't have to dig them up.  Just let them sit and divide and get bigger.  When they get to the point where they seem crowded, I can pull them up and divide.

How fun!  I think the bearded Iris has officially become my most favorite bulb flower.  I will definitely have issues just walking past that annual display at Lowes without picking myself up a few more bulbs!

Sunday, October 17, 2010

The fall broccoli experiment continues


If you recall, I'm experimenting with broccoli varieties.  In August, I planted three varieties of broccoli:  Arcadia, Gypsy and Marathon.  I sowed 8 seeds of each.  Of those, 6 of the Arcadia made it to plant stage.  3 of the Marathon and only 1 Gypsy.

I've just transplanted the survivors today.  On the far left are the Arcadias, the Marathons are to the right, and the one rightmost plant is my lone Gypsy.  Today, they look identical.  If it weren't for labels I wouldn't know which was which.  We'll see how well they do.

Oh, and while I'm recording things, I sowed them in yogurt cups and let them grow for 9 weeks.  The roots were circling the bottom of the cup.  In the future, I should either transplant into the garden at 7-8 weeks, or maybe transplant into 4" pots at 6 weeks.

Friday, October 15, 2010

Compost

My very first compost!

Photobucket

I made it with this little bad boy, but not like the advertiser's claim:

Photobucket

I don't know if you've seen these advertised, but I found after 6 months of use, it's not the simple matter of neatly throwing stuff in the top then shoveling it out the handy little door in the bottom (while wearing cute white chinos and some Sunday mocs).

For one thing, the door is too small to really get a shovel into. You can get a few shovel loads out of the space near the door (which of course isn't well composted because it's on the outside), but trying to get to the good stuff in the middle is nearly impossible. And forget turning it or mixing it up. Extremely awkward.

BUT!!! I really love the bin, love the handy wide lid, love how neat it is--important since our California yard is measured in square feet not acres. So what I did was remove the bottom panel. The rest of the bin stays together just fine without it. Now, I throw all my stuff in the top, add some water, and on those occasions when I want to turn the pile to speed things up, I simply lift the container off the pile, set it down a couple feet away and refill.

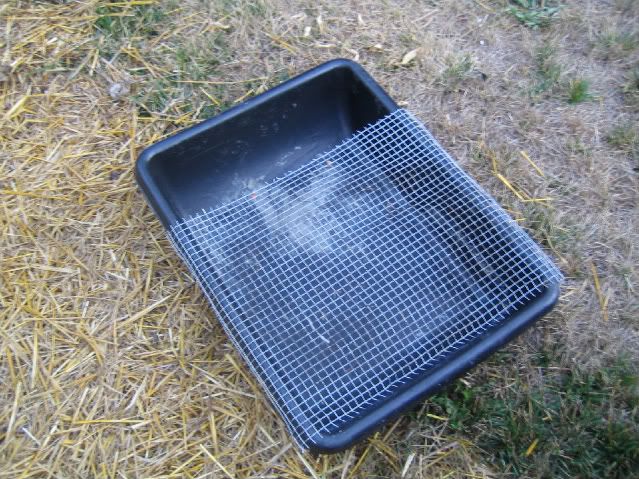
I created a screen with stuff I had laying around:

Photobucket

With my concrete projects, I've got lots of reinforcement screen and mixing bins laying around. I shovel the compost over the top of the screen then dump it into my wheel barrow through the space. Not as ideal as a good wood-framed screen, but I can't nail 4 boards into a rectangle to save my life.

So I'm off! Told the hubby to pick up speed saving those coffee grounds and vegetable scraps. I've got my system down and I'm ready to make dirt!

Sunday, October 10, 2010

Ooh, my new love!

I gave this new method of mosaic a shot and now I'm totally in love.


You place the tiles on the bottom of the form, back-side-up, then pour the concrete on top. The following day, you pop them out of the form, use a stiff brush and water to clean off the "top" and here you go.


The paper shifted a bit on this one and they ended up crooked. Note to self to use something to keep them stuck in the future--double-sided tape maybe.


I used shelving paper, sticky side up, to adhere the tiles in place. It's a must that the tiles have one flat side that will adhere well to the sticky paper. Place the finished design in the bottom of the concrete form. I poured a "slurry" over the design, which is just some of the concrete mix with more water so it's a creamier consistency to get in between the tiles. Fill the rest of the form with concrete. I used a mortar mix for these, reinforced with a sheet of mesh.

The glass cubes came out BEAUTIFULLY! The effect is so cool. But I've got a ton of leftover tile--ceramic, porcelain, stone--so I'm going to make more using different materials. But I love these! They're so fun to make, and turning them over the next day and scrubbing them up is like opening a Christmas present. You don't know exactly what you're going to get.

Happy, Happy, Happy!!!

Sunday, October 3, 2010

Garden Mushrooms

I started a new collection of mushrooms today.  These are in various shapes and sizes from containers I found at Raley's one day.  I tried a recipe for concrete that might be lighter than mortar or regular aggregate.  It was:

1 Part Portland Cement
1 1/2 Parts Sand
1 1/2 Parts Perlite


We'll see how big a difference it makes in the weight.  I'm hoping for at least noticeable, as it will be the mix I use for my next garden table.

Oh, and when determining my volume, I forgot that the Portland cement adds no volume.  Thus, when calculating my parts, I should have figured the sand/perlite volume only.  It was okay, I just mixed up more at the last minute!

Saturday, October 2, 2010

My latest garden project

A path to the workshop and some more planting space.

I wanted more room for veggies next spring, but instead of digging out another bed, I went for some raised wine barrels that I stained in fun colors. My only complaint is that the stain is more opaque than I'd wanted. I had been hoping for more of a whitewash effect.


The path will come in handy during the winter when the rock gets wet and sticks to your shoes. Now I've got a path that will get me to the shed and back without having to walk on it.

Saturday, September 25, 2010

The Garden Table is Done!

It started out as this:

Photobucket

A little concrete and tile later and I've got a really inexpensive garden table/stool:

Photobucket
Photobucket

The top was supposed to have been a sunflower, but I wasn't able to find yellow ceramic tiles in quantities smaller than a case. So halfway through, I modified my design to just go with what I had:

Photobucket

LOTS of things I'll do differently with the next one, mostly having to do with the cement and how heavy this is (we won't be moving this puppy anytime soon). And after having to abandon my design for lack of supplies, I'm definitely going to make my next mosaic out of 3/4" mosaic tiles that I can get on line in all the colors I want. I tried going with the larger format, but it's just too hard to find pretty colors in small quantities. Also, the ridges on the back of the ceramic tile make it a pain to keep the tiles level once they've been cut. And forget cutting porcelain without a wet saw!

But this was definitely a fun project, and a bargain table to end up with at about $30 for all the materials.

My best new discovery is the Lastiseal water based color concrete sealer I used on the base. I was really pleased with how it came out looking like an acid stain without all the harsh chemicals. And it comes in a zillion beautiful colors.

Today's Harvest


I've been pulling the tomatoes during the "turning" stage in the hope that it will let the plant focus on the remaining fruit.  I don't know if there's any science to it, but that's my thinking.  I'm also getting such a sparse harvest that I'll be rather infuriated if I lose any of it to critters and birds.  So I'm yanking them to keep them safe.

I've got lots and lots more green beans sprouting from the second planting I did.  They are overgrowing my supports and shading the broccoli I planted one bed over.  I think my green bean arbor I'm planning for next year is a good idea.

Friday, September 24, 2010

Summer Garden Update

I'm down to one squash plant that is showing signs of mildew.  Because it still has zucchini on it, I've cut off all the leaves that have mildew and am hoping the plant will give me a few more fruits.

Tomatoes are growing strong, the big ones are finally starting to turn and the weather man is forecasting a 4-day warm spell.  I'm crossing my fingers I can get the bulk of those big tomatoes in before the frost.

Green Beans are still going strong.  I've got flowers all over and more beans coming out.  Luckily, I can freeze them because Al says he's tired of eating them (already!).  I'm hoping to keep the beans and tomatoes going for another month at least.

And I've finally pulled the last of the cucumber.  Probably won't plant those again next year, because no one likes to eat them.  I'll be better served using the space to try to keep peas going, or see if I can get broccoli or carrots going through the summer.

Never forget the slug bait!

Grrr.  I went out to survey all the wonderful little plants I'd put in the ground last weekend, only to find that something has devoured half my broccoli.  I'm guessing slugs.  I sprinkled Sluggo everywhere and hope that takes care of it.  I hope so, because the poor little broccoli probably won't survive another invasion.

Monday, September 20, 2010

Fall Planting

I spent Saturday turning over my beds, digging in some steer manure and Super Soil and getting fall vegetables planted. These are starts I bought at Lowes and Raley's because my own broccoli starts still aren't ready for planting.

This year, I'm trying my hand at bok choi.  Last year, aphids won the battle over my chard.  This year, I'm trying neem as a preventative measure (instead of waiting until after the bugs show up).  I'll be spraying neem weekly and will see how that works.

Behind the chard in a "V" shape is the snow peas I planted from seed about 3-4 weeks ago.  The birds keep eating the the little seedlings and I've had them netted, but I had to pull the nets out to get the bok choi in.  Hopefully, the birds will move on to other things.


On the other side of the cucumber plant that's still producing, I'm giving cabbage a try. That's new to me also this year. We'll see how it does.


Here's my Lowe's broccoli. I'll succession plant my seedlings in a few weeks when they're ready. By then, I'll be done with the cucumbers and zucchini, most likely, and will have room.


I'm giving brussel sprouts a try here next to the zucchini. I've crowded them in with some herbs, and behind them I've started shelling peas from seed. I know these brussel sprouts will get big. Hopefully, I've given everything enough room.


In the midst of this, I've still got some gorgeous tomatoes growing. They're beautiful. Now, my only hope is the weather holds out long enough for them to turn. I think both of these are the yellow brandywine I planted. We'll see.


The sunflowers came out Saturday as well, uncovering some vines I had planted. This passion flower will take over the corner hopefully. They supposedly attract birds and butterflies. They are also invasive, so I'll be working to keep them trimmed.


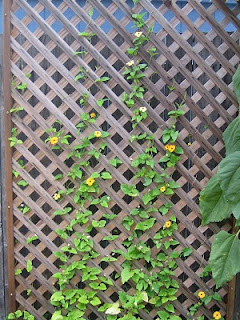
And then I had this pretty Black Eyed Susan vine that I'd planted from seed. It didn't get as big as I'd hoped it would, but I think that's because the sunflowers overcrowded it for most of the growing season. Hopefully, I'll be able to enjoy this for a couple months before it's done in by frost.

Sunday, September 5, 2010

My favorite so far


I bought a second book on mosaic, and this one provided me with an Aha! moment.  The book had a large section on design and talked about the fact that mosaic is as much about pattern as color.  I hadn't thought about that at all, and my prior work showed it.  With this one, I incorporated pattern as best I could.  I love the combination of large and small tiles, but I am growing weary of ceramic tile.  It offers me the larger size to make things like these petals, but the thickness makes it difficult to cut and it's prone to chipping.

Eventually, I will convert to making mosaic from actual mosaic tiles--thin glass and unglazed ceramic that comes in 3/4" squares.  The more I learn about pattern, I can probably obtain the same effect with these petals using smaller pieces.  The only edge I get from using these larger shapes is that no one seems to be doing it.  I kind of like the originality of that....

Saturday, September 4, 2010

Mmmm...Zucchini Bread

This is delicious, exactly the perfect thing to do with all that zucchini.  I've shredded the zucchini and packaged it for the freezer in batches of 2 cups, just the right amount for whipping up a quick loaf when the mood strikes. 


This recipe is to die for.  It's from the Sunset Vegetable Cook Book:


Spicy Pineapple Zucchini Bread

3 eggs
1 cup salad oil
2 cups sugar
2 teaspoons vanilla
2 cups coarsely shredded unpeeled zucchini
8 oz crushed pineapple drained well
3 cups all-purpose flour
2 teaspoons baking soda
1 teaspoon salt
1/2 teaspoon baking powder
1 1/2 teaspoons ground cinnamon
3/4 teaspoon ground nutmeg
1 cup each currants and finely chopped walnuts (either/or optional IMO)

In large bowl, beat eggs until frothy.  Add oil, sugar, and vanilla.  Continue beating until mixture is thick and foamy.  Stir in zucchini and pineapple.  In another bowl (though I just mixed all this in one big bowl), combine flour, baking soda, salt, baking powder, cinnamon, nutmeg, currants and walnuts.  Stir until blended.  Stir flour mixture into zucchini mixture just until dry ingredients are moistened.  Spoon batter evenly into 2 greased and flour-dusted 9X5 inch loaf pans.

Bake in a 350 degree oven for 1 hour or until a wooden pick inserted in center comes out clean.  Let cool in pans on wire racks for 10 minutes, then turn out onto racks to cool completely.  Before slicing, wrap tightly and refrigerate until the next day (we couldn't wait and ate a few slices while it was warm.   It was fine.)

Makes 2 loaves.

Bloomin' Labor Day

Sunflowers are taking over the garden.


They're towering up to the sky.


And spilling over the trellises.


All except for this guy, who has been pouting ever since he bloomed.


But my jewel of the garden this summer is the morning glory. I grew these from seeds and they're marvelous.


I love the variety of color (click on the picture to see it full sized). 

Wish they would stay all year.